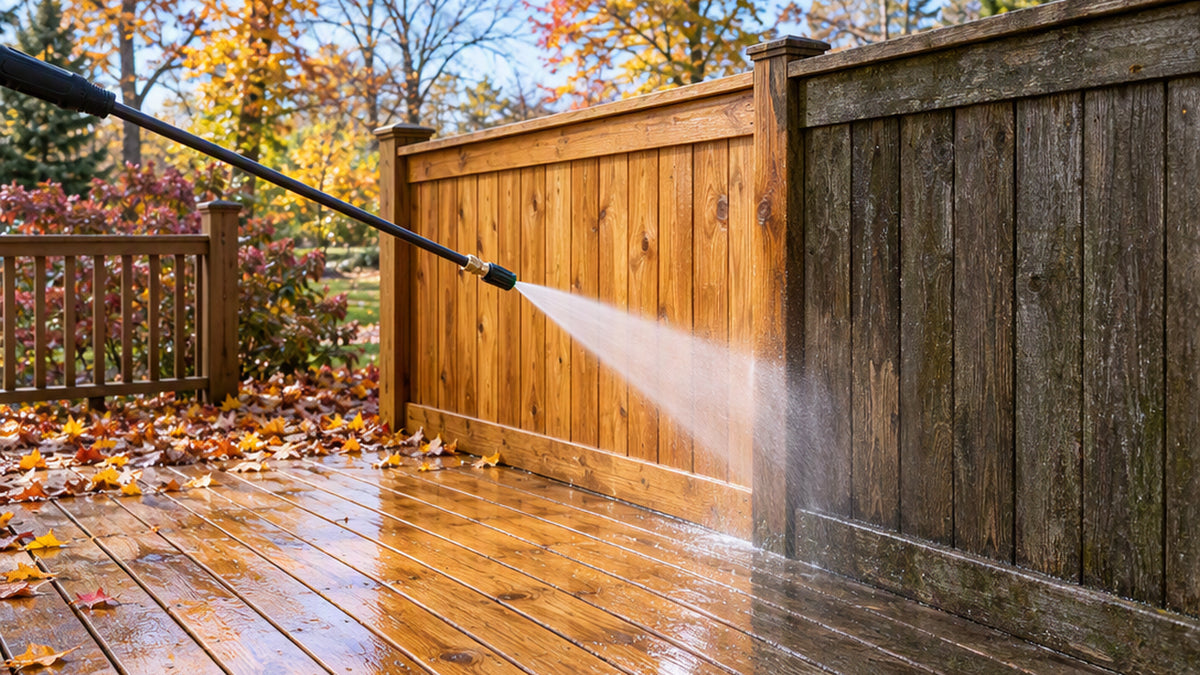
Fall is one of the best times to pressure wash your deck and fence. Summer humidity leaves behind mildew and algae, leaves stain the boards, and the coming winter will lock that grime in under snow and ice. A good cleaning now makes the wood look better and prepares it for sealing or staining. The catch is that wood is softer than concrete, so the wrong technique can leave gouges, fuzzy fibers and streaks. Here is how to do it safely.
Why clean before winter?
- Removes mildew and algae that make surfaces slippery and can hasten wood decay.
- Clears leaf stains and debris that trap moisture against the wood.
- Preps for sealing. Stain or sealer needs a clean, dry surface to adhere well.
- Reveals problems early. Loose boards, popped nails and rot are easier to spot on clean wood.
What you need
- A pressure washer (electric or gas) with an adjustable or interchangeable nozzle
- A set of nozzle tips, including a wide fan tip and a soap nozzle
- Deck cleaner or a mild wood-safe detergent
- A stiff-bristle brush or deck scrubber
- Painter's tape, plastic sheeting and eye protection
- Closed-toe shoes and gloves
Step 1: Prepare the area
Move furniture, planters and grills away. Sweep off leaves and loose dirt. Cover nearby plants and shrubs with plastic sheeting, since cleaning solutions and strong spray can harm them. Check for nails or screws sticking up and tap them down so they do not catch the spray or hurt your feet.
Step 2: Pick the right nozzle
Nozzle choice is the biggest factor in protecting wood. In general:
- Red (0 degrees) is a pinpoint jet and far too harsh for wood. Avoid it.
- Yellow (15 degrees) is aggressive and best left to concrete or stubborn stains on hard surfaces.
- Green (25 degrees) is a common choice for general cleaning and works for many decks if you keep a safe distance.
- White (40 degrees) is the gentlest, ideal for softer woods and fences.
- Black is the low-pressure soap nozzle used to apply detergent.
The pressure washer nozzle tips set includes a black brass soap nozzle plus red (0 degree), yellow (15 degree), green (25 degree) and white (40 degree) stainless steel tips, which covers every job in this list. For a detailed breakdown of each color, read our post on pressure washer nozzle colors.
Step 3: Apply cleaner first
Pre-wet the surface lightly, then apply a deck cleaner using the low-pressure soap nozzle. Work in sections and let it sit for the time recommended on the label, typically 10 to 15 minutes. Do not let it dry on the wood. For stubborn spots, scrub with a stiff brush. If you are new to detergent application, see our guide to using a pressure washer soap nozzle.
Step 4: Wash with the grain
Switch to a wide-angle tip (white or green) and begin with the wand about 12 to 18 inches from the surface. Test a small, hidden spot first to see how the wood responds. If the wood fuzzes or gets marked, move back or switch to a gentler tip.
Keep these habits:
- Follow the grain. Move the spray along the length of each board, not across it.
- Keep the wand moving. Pausing in one spot can leave marks.
- Overlap passes slightly for an even finish and to avoid stripes.
- Hold the wand at a consistent angle, about 45 degrees, rather than pointing straight down.
- Work from top to bottom on fences and railings so dirty water runs onto uncleaned areas.
Step 5: Clean the fence
Fences are usually vertical wood, so start at the top of each section and work down in smooth, overlapping strokes. Use the widest tip and stay farther back than you would on a deck. Pay special attention to the lower third of the fence, where moisture and soil promote mildew. Rinse thoroughly so detergent does not stay on the wood.
Step 6: Rinse and let it dry
Rinse the entire area with a wide fan tip to remove all cleaner residue. Then let the wood dry completely, which can take a day or two depending on weather. Avoid walking on a wet deck, as it can be very slippery.
Step 7: Seal or stain if needed
Once the wood is dry, inspect it. If water no longer beads on the surface, the wood is due for a new coat of sealer or stain. Applying it in early fall gives it time to cure before winter weather arrives. Always follow the manufacturer's temperature and drying guidelines.
Common mistakes to avoid
- Using a narrow, high-pressure tip too close to the wood
- Spraying across the grain
- Skipping the test spot
- Letting detergent dry on the surface
- Pressure washing when freezing weather is forecast, since wet wood can freeze and become slippery
Keep your equipment ready
A smooth wash depends on leak-free connections and a working hose. If you notice drips at the quick connect, replace worn O-rings before you begin. The 40-pack of pressure washer O-rings includes 20 pieces for 1/4-inch quick connect couplers and 20 for 3/8-inch fittings, so you will have spares for future jobs. You can find more small parts and accessories in our pressure washer parts and accessories collection.
After the job: store your washer for winter
When you finish, drain the hose and pump according to your manual and store the machine somewhere that stays above freezing. Water trapped inside can freeze and crack components. Wipe down the gun, coil the hose loosely and keep accessories in a labeled box so they are ready in spring. If you also use a garden hose with your washer, check out our garden watering and hose fittings for connectors that make winter prep easier.
Ready to give your deck a fresh start? Browse the Pressure Washer Parts & Accessories collection and gather the tips, hoses and fittings you need.