
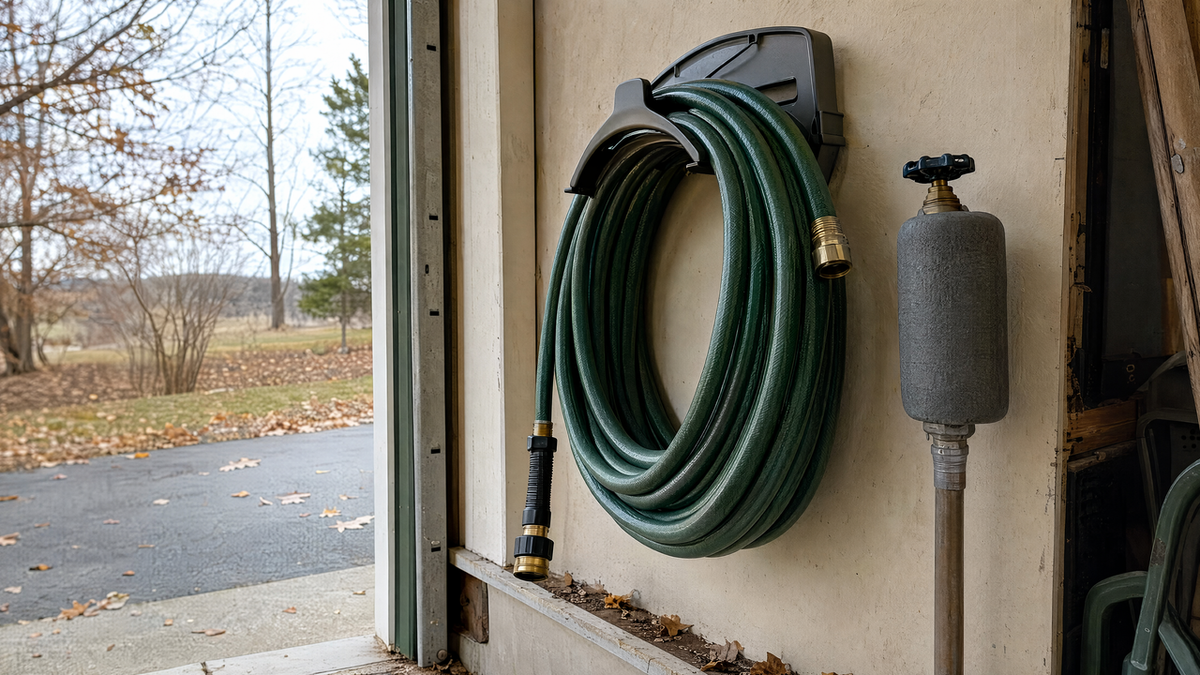
A garden hose left outside through a northern winter rarely comes back the same. Water trapped inside freezes, expands, and splits the lining from the inside out. Fittings crack. And the faucet the hose was still attached to can freeze and burst inside the wall, which is a much more expensive problem than a hose. The good news is that storing a garden hose for winter takes about twenty minutes, and doing it right means you won't be shopping for a new hose in April.
Here's the full process, from the first frost warning to spring hookup.
When to Put Your Hose Away
Disconnect and store hoses before the first hard freeze, meaning a night at or below 28°F for several hours. In much of the northern US that arrives in October; in the mid-Atlantic and Southeast it may not come until November or December. If you still water fall plantings into late autumn, that's fine. Just disconnect the hose from the spigot after each use once nights dip near freezing. A hose lying on the lawn will survive a light frost; a hose still screwed onto the faucet during a freeze is what causes damage.
Step 1: Shut Off the Water and Drain the Hose
Turn off the spigot, then squeeze the nozzle trigger to release pressure. Unscrew the hose from the faucet. Now drain it: the easiest method is to walk the hose out straight down a driveway or slope, lift one end over your shoulder, and work your way along its length, raising each section so the water runs out the far end. For a 50-foot hose this takes a couple of minutes. For a 100-foot hose, do it in two passes.
If your yard is flat, a hose reel helps. Crank the hose in slowly while holding the free end low so water drains as it winds. You won't get every drop, and you don't need to. The goal is to leave no continuous column of water that can freeze solid and split the wall.
Don't skip the nozzle and attachments
Remove the spray nozzle, wand, sprinkler, or any inline accessory. These hold water in small internal chambers that you can't drain by gravity, and they're the first things to crack. Shake them out, let them air-dry for a day, and store them indoors.
Step 2: Pull Everything Off the Spigot
This is the step people miss. Anything that stays on the faucet over winter, whether a Y-splitter, a timer, a backflow preventer, or a quick-connect adapter, traps water against the valve and prevents the spigot from draining. Even frost-free sillcocks, which are designed to drain themselves, will freeze and burst if something is left screwed on.
Take the splitter off and drain it. Brass splitters and valves like the solid brass shut-off valve will survive years of this treatment if they're stored dry; the plastic versions often develop hairline cracks in the ball-valve housing after one hard winter, which is why we generally recommend upgrading to brass fittings from our garden watering and hose fittings collection if yours are plastic.
Protect the faucet itself
Once the spigot is bare, let it drip for a moment, then close it firmly. If your home has an interior shut-off valve for the outdoor line (usually in the basement or crawlspace near where the pipe exits), close it, then reopen the outdoor spigot for a few seconds to let the pipe between the two valves drain. Leave the outdoor spigot slightly open all winter so any residual water has room to expand. Finally, slip an insulated foam faucet cover over the spigot. They cost a few dollars and are cheap insurance against a burst pipe.
Step 3: Coil the Hose Without Kinking It
A hose stored in tight loops or folded over on itself develops permanent kinks that weaken the wall and restrict flow next season. Coil it in loose loops roughly three feet across. Rubber and hybrid hoses coil easily; vinyl hoses are stiff in cold weather, so coil them on a mild afternoon while the material is still pliable.
A simple loose coil secured with two Velcro straps or a piece of rope is all it takes.
Connect the two ends together
Screw the male and female ends together loosely once the hose is coiled. It keeps dirt, insects, and spiders out of the hose and stops the coil from unraveling. If you use quick-connect hose fittings, just click the ends together. It's also a good time to check the rubber washers in each end. If they're flattened, cracked, or hard, swap them now so you aren't chasing a drip at the faucet in spring. Most quick-connect sets ship with spares.
Step 4: Store It Somewhere Above Freezing
The ideal spot is a garage, basement, or shed that stays above 32°F. Hang the coil on a wide hose hanger or lay it flat on a shelf. Avoid hanging it on a single nail; the weight concentrates on one point and creates a kink that becomes a weak spot. A five-gallon bucket works well if you drop the coil inside, and it doubles as a carrier in spring.
If there's no indoor space, draining thoroughly matters even more. Coil the hose, cap the ends together, and set it in a covered spot off the ground, such as a deck box or under a porch. A fully drained hose will usually survive; expect a shorter lifespan than one kept indoors.
Step 5: Make a Spring Checklist While You're At It
Before you close the garage door for the season, note what needs replacing. Common items:
- A nozzle that leaks from the handle or won't shut fully
- Hose washers that have gone hard
- A splitter valve that's stiff or drips at the stem
- Cracked or corroded fittings on the hose ends
Buying these in the off-season is easier than discovering them the first warm Saturday when every hardware store is picked over. Browse the best sellers for the fittings and nozzles most customers end up replacing, or check the sale collection for end-of-season pricing.
A Note on Expandable Hoses
Expandable (pocket) hoses have a thin latex inner tube that holds water in the fabric layer. Disconnect both ends, let the hose contract fully, and hang it to dry for a day before coiling. Always store these indoors; a wet expandable hose in a cold bag will be ruined by spring.
Three Mistakes That Ruin a Hose Over Winter
Leaving the hose connected to the faucet. The most common cause of a burst outdoor pipe, no matter how well-insulated the spigot is.
Storing it with water inside. A hose that feels empty may still hold a cup or two in low spots, and ice in a pocket like that splits the wall right there.
Leaving the splitter or timer on the spigot. Plastic timers in particular crack internally and leak from day one in spring.
Spring Hookup: Reverse the Process
When nights stay reliably above freezing, reopen the interior valve, connect the hose, and let water run through with the nozzle off for thirty seconds to flush anything that settled inside. Check for drips at the faucet, splitter, and nozzle. If a connection leaks, a new washer solves it nine times out of ten.
A hose that's stored properly can last ten years or more. One left outside through a few winters rarely makes it past the third. Twenty minutes in October is a good trade.
Getting your watering setup ready for winter, or restocking for spring? Find brass splitters, shut-off valves, quick connectors, and replacement washers in our Garden Watering & Hose Fittings collection.